In this article I will explain briefly about how to use iometer for simulating I/O load. Here in my test a 600GB LUN is provisioned from a Compellent storage array and connected to an ESXI 6.5 server as a data store. I've created a VM with 2 disks (C and E for OS and data) on the 600GB data store. We will be using drive E (40 GB) for the test with NTFS partition having 4KB allocation unit size.
Parameters:
Disk Workers - 2 (that means 2 worker threads will run simultaneously during the test)
Disk Targets - Select drive E on both disk workers
Maximum Disk Size - 0 (entire drive E will be used for the test)
Rest all values - default

Network Targets - leave the settings as it is (as we are not doing network stress)
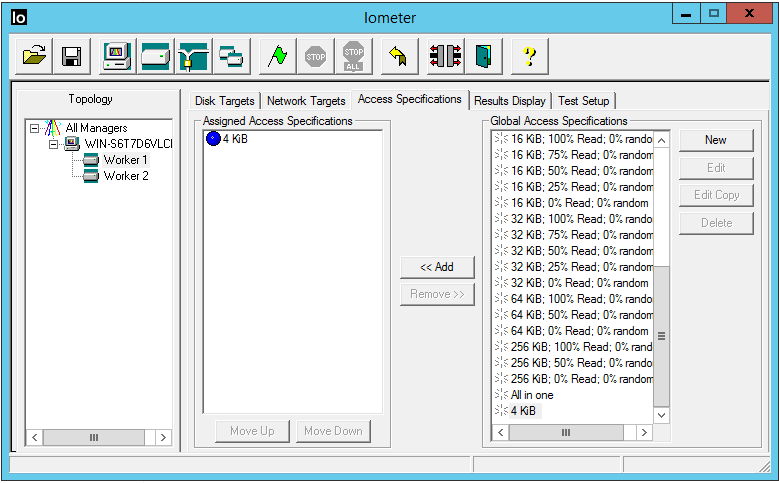
Access Specifications - it specifies the read/ write block size, percentage of read/ write, random/ sequential access etc.
Max IOPS at - 512 bytes transfer request size, 100% sequential, 100% reads
Max throughput at - 64K transfer request size, 100% sequential, 100% reads
In a real world situation it totally depends on the type of workloads. Here we are considering 4KB blocks, with 90% write, 10% read and 100% random access. These values are close to and are applicable to most virtualization workloads.
Transfer Request Size - 4KB
Percent Random/ Sequential Distribution - 100% Random
Percent Read/ Write Distribution - 90% Write
Rest all values - default

Once all the above settings are configured, you can click the green flag on the top to start the test. Now when you start it, you can see a test file (iobw.tst) will be created in drive E which will grow to the entire size of the disk (approx. 40GB). This is shown in the screenshots below.
Note: For creating a 40GB test file it takes few minutes
On the results display tab, set update frequency to 1 second to view real time results. You can also use the performance monitor tools to view disk reads and writes to cross check with the values of iometer.
Total I/Os per second = disk reads/ sec + disk writes/ sec

You can also monitor read/ write operations of your data store as shown below. These values should also match the results obtained from iometer and perfmon (as there is only one VM on this data store). In the below graph you can see the data store was almost idle as there was no operations on it. The moment I started iometer, it is creating iobw.tst file which is basically a 40GB write operation on drive E.


There is one more way you can monitor the IOPS value. While the iometer is running open resource monitor and observe disk activity generated by dynamo.exe. Make a note of total bytes. Convert it to Kilobytes and divide it by 4. This gives you the total IOPS which also should be close to values generated by iometer which is shown below.

ESXI performance graph is also shown below.

Final results:
iometer - 3799 IOPS
Perfmon - 372 + 3344 = 3716 IOPS
Disk activity monitor - (15291932 Bytes) 14933KB/ 4KB = 3733 IOPS
ESXI performance monitor - 373 + 3365 = 3738 IOPS
Note: To simulate a complex real world scenario or to benchmark your storage system you can provision multiple LUNs from the storage array, host few virtual machines on those LUNs and run iometer with different access specifications.
Hope this article was useful to you. Cheers.