Following powershell script can be used to deploy virtual machines on a Hyper-V host.
CODE:
#Start
#VM name
[string]$vmname = Read-Host "Name of VM"
$vmcheck = Get-VM -name $vmname
#To check for duplicate VM on the host
if(!$vmcheck)
{
Write-Host "Above warning can be ignroed as there is no duplicate VM. Please proceed and enter following details. `n"
[int32]$gen = Read-Host "Generation type"
[int32]$cpu = Read-Host "Number of vCPU"
[string]$vmpath = Read-Host "Enter path for VM configuration files (Eg: E:\VM)"
[string]$dynamic = $null
while("yes","no" -notcontains $dynamic)
{
$dynamic = Read-Host "Will this VM use dynamic memory? (yes/no)"
}
#Dynamic memory parameters
if($dynamic -eq "yes")
{
[int64]$minRAM = Read-Host "Minimum memory (MB)"
[int64]$maxRAM = Read-Host "Maximum memory (MB)"
[int64]$startRAM = Read-Host "Starting memory (MB) [Note: Specify value between $minRAM and $maxRAM]"
$minRAM = 1MB*$minRAM
$maxRAM = 1MB*$maxRAM
$startRAM = 1MB*$startRAM
#Creating the VM with dynamic RAM
New-VM -Name $vmname -Path $vmpath -Generation $gen
Set-VM -Name $vmname -DynamicMemory -MemoryStartupBytes $startRAM -MemoryMinimumBytes $minRAM -MemoryMaximumBytes $maxRAM
}
else
{
#Creating the VM with static RAM
[int64]$staticRAM = Read-Host "Static memory (MB)"
$staticRAM = 1MB*$staticRAM
New-VM -Name $vmname -Path $vmpath -Generation $gen -MemoryStartupBytes $staticRAM
}
#Setting VM auto start to none and auto stop to shutdown
Set-VM -Name $vmname -ProcessorCount $cpu -AutomaticStartAction Nothing -AutomaticStopAction ShutDown
#Creating VM hard disk directory
New-Item -path $vmpath\$vmname -name "Virtual Hard Disks" -type directory
#Enabling processor compatibility configuration for migration
Set-VMProcessor $vmname -CompatibilityForMigrationEnabled $true
}#vmcheck ends here
else
{
Write-Host "A VM named $vmname already exists"
}
Reference:
techthoughts
starwindsoftware
CODE:
#Start
#VM name
[string]$vmname = Read-Host "Name of VM"
$vmcheck = Get-VM -name $vmname
#To check for duplicate VM on the host
if(!$vmcheck)
{
Write-Host "Above warning can be ignroed as there is no duplicate VM. Please proceed and enter following details. `n"
[int32]$gen = Read-Host "Generation type"
[int32]$cpu = Read-Host "Number of vCPU"
[string]$vmpath = Read-Host "Enter path for VM configuration files (Eg: E:\VM)"
[string]$dynamic = $null
while("yes","no" -notcontains $dynamic)
{
$dynamic = Read-Host "Will this VM use dynamic memory? (yes/no)"
}
#Dynamic memory parameters
if($dynamic -eq "yes")
{
[int64]$minRAM = Read-Host "Minimum memory (MB)"
[int64]$maxRAM = Read-Host "Maximum memory (MB)"
[int64]$startRAM = Read-Host "Starting memory (MB) [Note: Specify value between $minRAM and $maxRAM]"
$minRAM = 1MB*$minRAM
$maxRAM = 1MB*$maxRAM
$startRAM = 1MB*$startRAM
#Creating the VM with dynamic RAM
New-VM -Name $vmname -Path $vmpath -Generation $gen
Set-VM -Name $vmname -DynamicMemory -MemoryStartupBytes $startRAM -MemoryMinimumBytes $minRAM -MemoryMaximumBytes $maxRAM
}
else
{
#Creating the VM with static RAM
[int64]$staticRAM = Read-Host "Static memory (MB)"
$staticRAM = 1MB*$staticRAM
New-VM -Name $vmname -Path $vmpath -Generation $gen -MemoryStartupBytes $staticRAM
}
#Setting VM auto start to none and auto stop to shutdown
Set-VM -Name $vmname -ProcessorCount $cpu -AutomaticStartAction Nothing -AutomaticStopAction ShutDown
#Creating VM hard disk directory
New-Item -path $vmpath\$vmname -name "Virtual Hard Disks" -type directory
#Enabling processor compatibility configuration for migration
Set-VMProcessor $vmname -CompatibilityForMigrationEnabled $true
}#vmcheck ends here
else
{
Write-Host "A VM named $vmname already exists"
}
#End
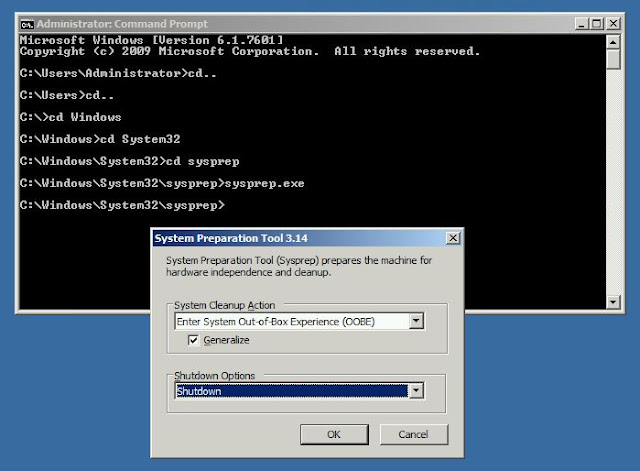
Now the VM is created. But it doesn't have virtual hard disk (VHDX file). Assuming that you already have a syspreped VHDX template. Copy that VHDX template to the virtual hard disk folder of the VM that you just created. Rename it as per your standard. Now attach the disk to SCSI controller if Gen 2 or to IDE controller if Gen 1. Change the boot order and select hard drive as first boot entry. Connect the NIC to vSwitch. Now you can start your VM.
Now the VM is created. But it doesn't have virtual hard disk (VHDX file). Assuming that you already have a syspreped VHDX template. Copy that VHDX template to the virtual hard disk folder of the VM that you just created. Rename it as per your standard. Now attach the disk to SCSI controller if Gen 2 or to IDE controller if Gen 1. Change the boot order and select hard drive as first boot entry. Connect the NIC to vSwitch. Now you can start your VM.
Reference:
techthoughts
starwindsoftware
