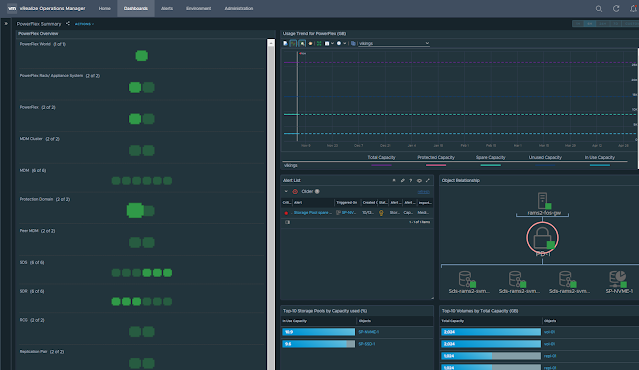
In this post, I will explain how to configure the PowerFlex Management Pack for vROps.
Before getting into the configuration, I would like to provide a high-level view of my lab setup. I have two separate PowerFlex rack systems that I will be monitoring using the management pack. The two systems are named RAMS and VIKINGS and have the following components.
The PowerFlex Management Pack supports the following 4 instance types:
- PowerFlex Networking - queries and collects networking details from Cisco switches
- PowerFlex Gateway - queries and collects storage details from PowerFlex Gateway
- PowerFlex Nodes - queries and collects server hardware health details from iDRACs
- PowerFlex Manager - queries and collects service deployment details from PowerFlex Manager
Note: The default collection interval for all PowerFlex Adapter instance types is set to 5 minutes.
I have already configured the controller VCSA and customer VCSA of both (RAMS and VIKINGS) clusters as shown below. This makes use of the native vSphere Adapter and vSAN Adapter present in vROps.
Now we can start adding required accounts for the PowerFlex Adapter to connect to the different REST endpoints.
PowerFlex Networking
Click add account.
Select the PowerFlex Adapter.
Let's configure the account for monitoring Cisco TOR switches of the RAMS cluster.
Provide the following details:
- Name
- Management IP address of Cisco TOR switches
Select the instance type as "PowerFlex Networking" and provide a system name.
In this case, these TOR switches are part of RAMS. So I have given the system name as RAMS.
Add a new credential. Select the credential kind as "PowerFlex Networking Adapter Credentials".
Provide a credential name, username and password. Click OK.
Click VALIDATE CONNECTION.
If everything is fine, you will get a test connection successful message. Click OK.
Click ADD to save the account. You will see the account we just created under the other accounts page.
Initially, the status will be warning but it will turn to OK in few seconds.
Note: In the product guide it is recommended to configure not more than 40 Cisco switches in one PowerFlex Networking instance. So, if you have 80 switches in your PowerFlex system, you will need to configure 2 PowerFlex Networking instances where each instance will connect/ query/ collect details from 40 switches.
PowerFlex Gateway
PowerFlex Nodes
Make sure to provide the PowerFlex Management Controller vCenter details in the advanced settings. If you have configured the native adapter with vCenter IP address, then you have to provide the IP address in the advanced settings. In this case, I have configured the native adapter with the vCenter hostname/ FQDN, so in the advanced settings, I have provided the same FQDN. This field will be used to identify and classify the PowerFlex Management Controller nodes.
Note: In the product guide it is recommended to configure 30 iDRACs or less in one PowerFlex Node instance. So, if you have 120 nodes in your PowerFlex system, you will need to configure 4 PowerFlex Node instances where each instance will connect/ query/ collect details from 30 iDRACs.
PowerFlex Manager
Note: While adding the credentials for the PowerFlex Manager, it is mandatory to provide the PowerFlex Manager Domain Name. VXFMLOCAL is the domain name for the default admin user.
Verify the status of all accounts.
Now we have finished creating all the required accounts to monitor the RAMS system. Similarly, you can add multiple PowerFlex systems and monitor them using the management pack. In my case, I have one more PowerFlex system named VIKINGS and I have added all the required accounts as given in the following screenshot. As you can see below, for the VIKINGS system I have configured seperate instances for CO, SO, and Controller nodes. This is because the iDRAC credentials for CO, SO, and Controller nodes are different.
In the dashboards section, you can see all the 13 dashboards. Depending on the number of components/ size of the PowerFlex system, it may take 15-20 minutes for the data to get populated in the respective dashboards.
In the next part, we will go through the different dashboards and other capabilities of the management pack. Hope it was useful. Cheers!
References


