Showing posts with label SDS. Show all posts

Sunday, November 8, 2020

Dell EMC PowerFlex MP for vROps 8.x - Part4 - Resource kinds and relationships

In this post, we will take a look at the different resource kinds that are part of the Dell EMC PowerFlex Management Pack. Following is a very high-level logical representation of the PowerFlex Adapter resource kinds and their relationships:


Go to Environment - All objects - PowerFlex Adapter


You can also get a PowerFlex system level view in vROps using the PowerFlex rack/ appliance system resource kind. This system view is making use of the system name field that we provided while configuring each PowerFlex Adapter instance type. The system name is used to group all the logical components of one PowerFlex system. 


This view provides end-to-end visibility of the PowerFlex infrastructure components that will be useful to understand the relationship between different layers of the stack. This will be also helpful to identify and troubleshoot in case of issues.

Hope it was useful. Cheers!

Related posts


Part1 - Install
Part2 - Configure
Part3 - Dashboards


Wednesday, November 4, 2020

Dell EMC PowerFlex MP for vROps 8.x - Part3 - Dashboards

We have covered the installation and configuration of the PowerFlex Management Pack in the previous posts. In this post, we will have a look at the different dashboards that are part of the MP. Following are the 13 dashboards you will get after installing the MP:

Overview
  • PowerFlex System Overview
PowerFlex Manager
  • PowerFlex Manager Details
Management Controller 
  • PowerFlex Management Controller
Compute
  • PowerFlex ESXi Cluster Usage
  • PowerFlex ESXi Host Usage
  • PowerFlex SVM Utilization
Networking
  • PowerFlex Networking Environment
  • PowerFlex Networking Performance
Storage
  • PowerFlex Summary
  • PowerFlex Details
  • PowerFlex Replication Details
Server Hardware
  • PowerFlex Node Summary
  • PowerFlex Node Details

Now, let's have a quick look at some of these dashboards and their functionality.

PowerFlex Node Summary


This dashboard shows the health of all PowerFlex nodes being monitored by the MP. You can see the classification of nodes as Compute Only, Storage Only, Hyperconverged, and Management Controller along with a relationship between a node and its corresponding hardware components.


PowerFlex Summary


This dashboard shows the health status of all the logical components of the PowerFlex storage system. It also has a parent-child relationship between different objects of the storage system. You can also see widgets for capacity usage trend forecasting, alerts, top storage pools by capacity usage, top volumes by size, etc.


PowerFlex Details


This dashboard shows all PowerFlex storage performance KPIs like IOPS, Bandwidth, Latency, etc.


PowerFlex Networking Environment


You can see the health status of Cisco networking components and the relationship between network interfaces, nodes, switch ports, VLANs, port-channels, etc.


PowerFlex Networking Performance


This dashboard shows the switch and switch port KPIs like Throughout, Errors, Packet discards, etc.


PowerFlex Manager


You can see the service deployment details like service health, RCM compliance status, deployment status, etc. in this dashboard.


Hope it was useful. Cheers!

References


Monday, November 2, 2020

Dell EMC PowerFlex MP for vROps 8.x - Part2 - Configure

In this post, I will explain how to configure the PowerFlex Management Pack for vROps


Before getting into the configuration, I would like to provide a high-level view of my lab setup. I have two separate PowerFlex rack systems that I will be monitoring using the management pack. The two systems are named RAMS and VIKINGS and have the following components.


The PowerFlex Management Pack supports the following 4 instance types:
  • PowerFlex Networking - queries and collects networking details from Cisco switches
  • PowerFlex Gateway - queries and collects storage details from PowerFlex Gateway
  • PowerFlex Nodes - queries and collects server hardware health details from iDRACs
  • PowerFlex Manager - queries and collects service deployment details from PowerFlex Manager

Note: The default collection interval for all PowerFlex Adapter instance types is set to 5 minutes.

I have already configured the controller VCSA and customer VCSA of both (RAMS and VIKINGS) clusters as shown below. This makes use of the native vSphere Adapter and vSAN Adapter present in vROps.


Note: The PowerFlex MP is already installed in vROps. Please see the previous post on how to install it.

Now we can start adding required accounts for the PowerFlex Adapter to connect to the different REST endpoints.

PowerFlex Networking


Click add account.


Select the PowerFlex Adapter.


Let's configure the account for monitoring Cisco TOR switches of the RAMS cluster.

Provide the following details:

  • Name
  • Management IP address of Cisco TOR switches

Select the instance type as "PowerFlex Networking" and provide a system name. 
In this case, these TOR switches are part of RAMS. So I have given the system name as RAMS.


Add a new credential. Select the credential kind as "PowerFlex Networking Adapter Credentials". 
Provide a credential name, username and password. Click OK.


Click VALIDATE CONNECTION.


If everything is fine, you will get a test connection successful message. Click OK.


Click ADD to save the account. You will see the account we just created under the other accounts page.
Initially, the status will be warning but it will turn to OK in few seconds.


Note: In the product guide it is recommended to configure not more than 40 Cisco switches in one PowerFlex Networking instance. So, if you have 80 switches in your PowerFlex system, you will need to configure 2 PowerFlex Networking instances where each instance will connect/ query/ collect details from 40 switches.

PowerFlex Gateway


PowerFlex Nodes


Make sure to provide the PowerFlex Management Controller vCenter details in the advanced settings. If you have configured the native adapter with vCenter IP address, then you have to provide the IP address in the advanced settings. In this case, I have configured the native adapter with the vCenter hostname/ FQDN, so in the advanced settings, I have provided the same FQDN. This field will be used to identify and classify the PowerFlex Management Controller nodes.

Note: In the product guide it is recommended to configure 30 iDRACs or less in one PowerFlex Node instance. So, if you have 120 nodes in your PowerFlex system, you will need to configure 4 PowerFlex Node instances where each instance will connect/ query/ collect details from 30 iDRACs.

PowerFlex Manager


Note: While adding the credentials for the PowerFlex Manager, it is mandatory to provide the PowerFlex Manager Domain Name. VXFMLOCAL is the domain name for the default admin user.

Verify the status of all accounts.


Now we have finished creating all the required accounts to monitor the RAMS system. Similarly, you can add multiple PowerFlex systems and monitor them using the management pack. In my case, I have one more PowerFlex system named VIKINGS and I have added all the required accounts as given in the following screenshot. As you can see below, for the VIKINGS system I have configured seperate instances for CO, SO, and Controller nodes. This is because the iDRAC credentials for CO, SO, and Controller nodes are different. 


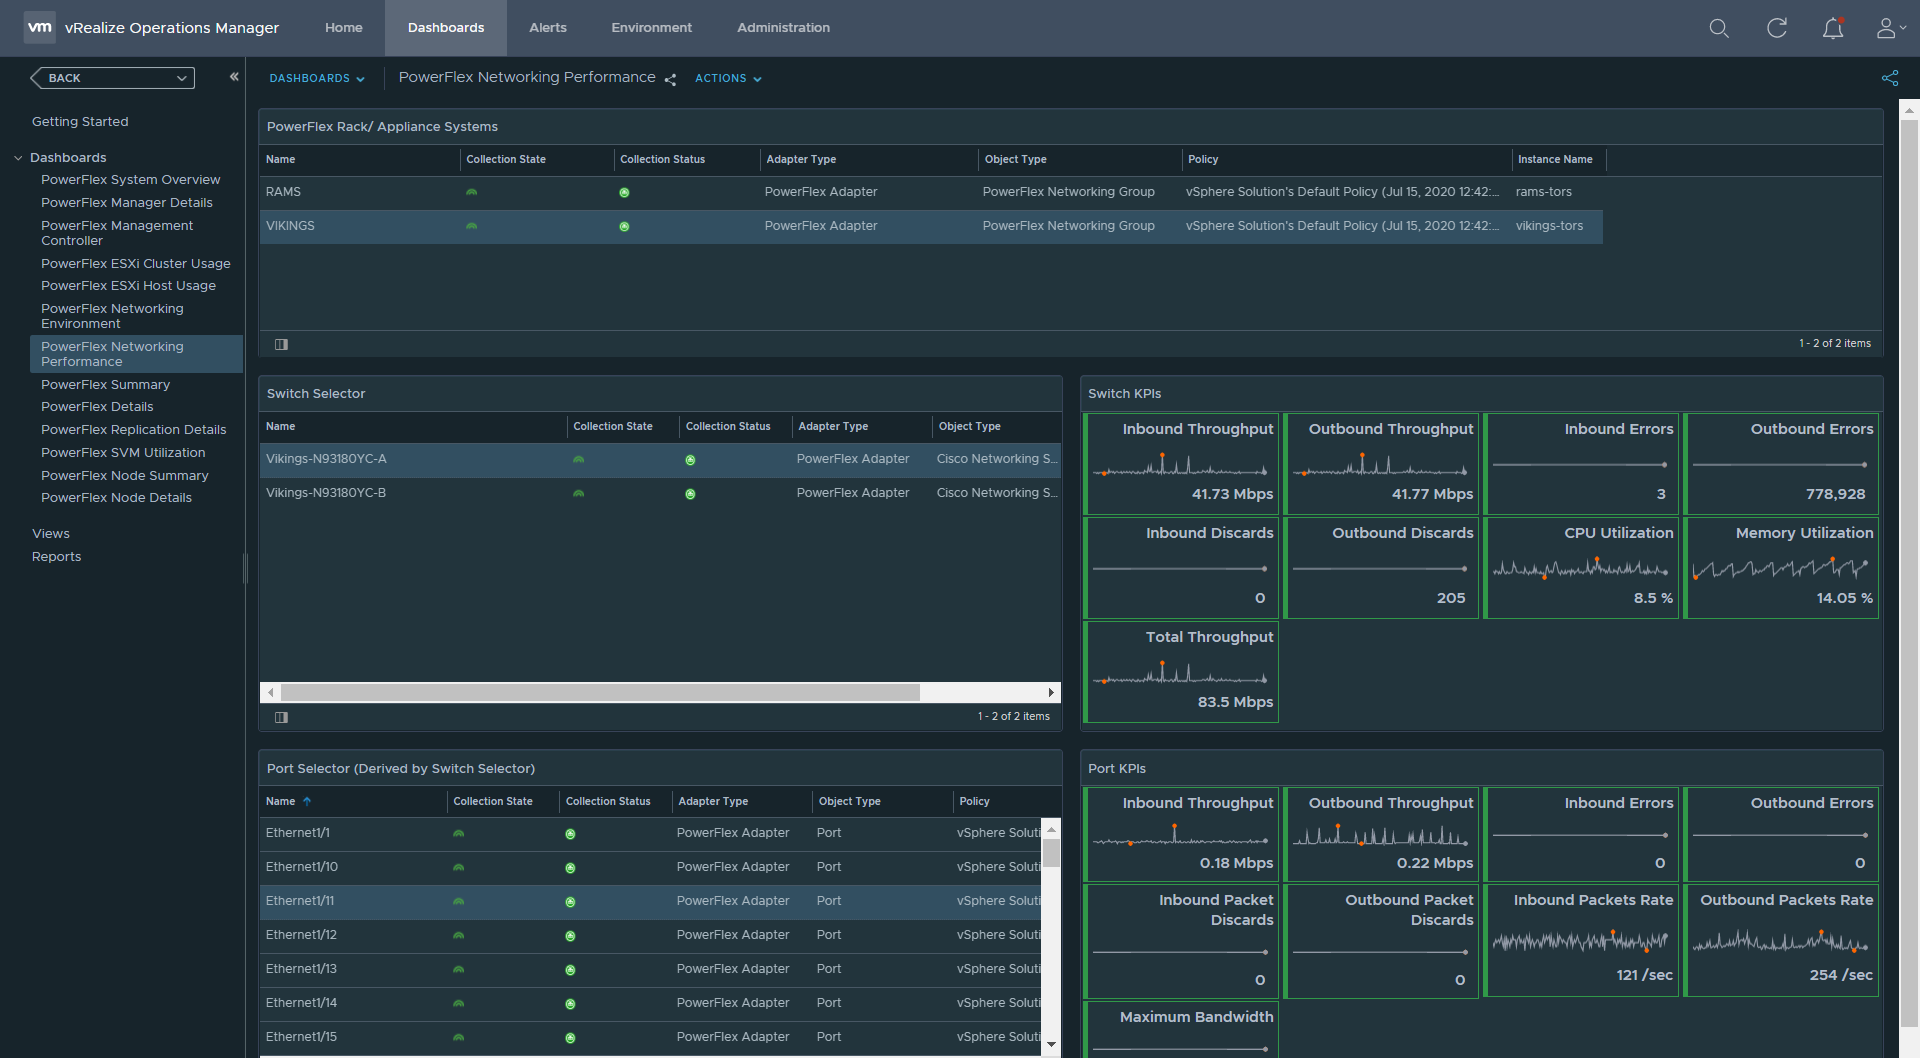
In the dashboards section, you can see all the 13 dashboards. Depending on the number of components/ size of the PowerFlex system, it may take 15-20 minutes for the data to get populated in the respective dashboards. 


In the next part, we will go through the different dashboards and other capabilities of the management pack. Hope it was useful. Cheers!

References

Friday, October 30, 2020

Dell EMC PowerFlex MP for vROps 8.x - Part1 - Install

Dell EMC has recently released a vROps management pack for PowerFlex. It is a monitoring and alerting solution that provides extensive visibility into PowerFlex systems using vROps. The management pack collects key metrics for PowerFlex storage, networking, compute, and server hardware and ingests into vROps. The solution is available to all PowerFlex rack and appliance customers free of cost. This brings additional value to the IT operations and life cycle management functionality delivered by PowerFlex Manager.

Now, let's start with installation of the management pack. The steps are same for vROps 8.0, 8.1, and 8.2.

Administration - Solutions - Repository - Add/ Upgrade

Browse and select the PAK file and click upload.


Click next.


Accept the EULA and click next.


Click finish.


The management pack is now installed and it will be listed in the repository.


Verify the contents of the management pack by selecting view content.


Verify the 13 dashboards.
Note: If any of the dashboards are missing, then try to reinstall the management pack.


In the next part, we will go through the adapter instance configurations. Hope it was useful. Cheers!

Related posts


Part2 - Configure
Part3 - Dashboards
Part4 - Resource kinds and relationships


References


Friday, October 23, 2020

VMware PowerCLI 101 - part8 - Working with vSAN

This article explains how to work with vSAN resources using PowerCLI. 

Note I am using the following versions:
PowerShell: 5.1.14393.3866
VMware PowerCLI: 12.1.0.17009493


Connect to vCenter:
Connect-VIServer <IP of vCenter server>

List all vSAN get cmdlets:
Get-Command Get-Vsan*


vSAN runtime info:
$c = Get-Cluster Cluster01
Get-VsanRuntimeInfo -Cluster $c


vSAN space usage:
Get-VsanSpaceUsage


vSAN cluster configuration:
Get-VsanClusterConfiguration


vSAN disk details:
Get-VsanDisk


View all properties of a disk:
(Get-VsanDisk)[31] | select *


View disk vendor, model, firmware revision, physical location, operational state:
(Get-VsanDisk)[31].ExtensionData


 vSAN disk group details:
Get-VsanDiskGroup


Get all properties of a disk group:

Saturday, June 30, 2018

Introduction to Nutanix cluster components

In this article I will briefly explain about the different components of a Nutanix cluster. The major components are listed below.

Nutanix cluster components
  1. Stargate: Data I/O manager for the cluster.
  2. Medusa: Access interface for Cassandra.
  3. Cassandra: Distributed metadata store.
  4. Curator: Handles Map Reduce cluster management and cleanup.
  5. Zookeeper: Manages cluster configuration.
  6. Zeus: Access interface for Zookeeper.
  7. Prism: Management interface for Nutanix UI, nCLI and APIs.
Stargate
  • Responsible for all data management and I/O operations.
  • It is the main point of contact for a Nutanix cluster.
  • Workflow: Read/ write from VM < > Hypervisor < > Stargate.
  • Stargate works closely with Curator to ensure data is protected and optimized.
  • It also depends on Medusa to gather metadata and Zeus to gather cluster configuration data.
Medusa
  • Medusa is the Nutanix abstraction layer that sits infront of DB that holds the cluster metadata.
  • Stargate and Curator communicates to Cassandra through Medusa.
Cassandra
  • It is a distributed high performance and scalable DB.
  • It stores all metadata about all VMs stored in a Nutanix datastore.
  • It needs verification of atleast one other Cassandra node to commit its operations.
  • Cassandra depends on Zeus for cluster configuration.
Curator
  • Curator constantly access the environment and is responsible for managing and distributing data throughout the cluster.
  • It does disk balancing and information life cycle management.
  • It is elected by a Curator master node who manages the task and job delegation.
  • Master node coordinates periodic scans of the metadata DB and identifies cleanup and optimization tasks tat Stargate or other components should perform.
  • It is also responsible for analyzing the metadata, this is shared across all Curator nodes using a Map Reduce algorithm. 
Zookeeper
  • It runs on 3 nodes in the cluster.
  • It can be increased to 5 nodes of the cluster.
  • Zookeeper coordinates and distributes services.
  • One is elected as leader.
  • All Zookeeper nodes can process reads.
  • Leader is responsible for cluster configuration write requests and forwards to its peers.
  • If leader fails to respond, a new leader is elected.
Zeus
  • Zeus is the Nutanix library interface which all other components use to access cluster configuration information.
  • It is responsible for cluster configuration and leadership logs.
  • If Zeus goes down, all goes down!
Prism
  • Prism is the central entity of viewing  activity inside the cluster.
  • It is the management gateway for administrators to configure and monitor a Nutanix cluster.
  • It also elects a node.
  • Prism depends on data stored in Zookeeper and Cassandra.

Note: All the info provided above are based on Nutanix 4.5 Platform Professional (NPP) administration course.

Wednesday, May 30, 2018

Creating HTML report of ScaleIO cluster using PowerShell

This post is a reference to a small reporting script for ScaleIO environments. The project will generate a brief HTML report of your ScaleIO Ready Node SDS infrastructure (with AMS - Automated Management Services) by making use of ScaleIO Ready Node AMS REST APIs and PowerShell. The report provides information about MDM cluster state, overall cluster capacity, system objects, alerts, and health state of all disks in the cluster. Here the API is available as part of ScaleIO Ready Node AMS. These AMS REST API allows you to query information and perform actions related to ScaleIO software and ScaleIO Ready Node hardware components. To access the API you need to provide AMS username and password. Responses returned by AMS server are formatted in JSON format.

Project referencehttps://github.com/vineethac/sio_report

Use case
: This script can be used/ leveraged as part of daily cluster health/ stats reporting process, or something similar; so that monitoring Engineers or whoever responsible can have a look at it on a daily basis to make sure everything is healthy and working normal. 

Related references:

Hope this was helpful. Cheers!

Thursday, November 30, 2017

Software Defined Storage using ScaleIO

In this article I will explain briefly about ScaleIO and various options that are available to deploy ScaleIO software defined storage (SDS) solution. 

ScaleIO can be considered as a very good option for customers who are moving towards deploying software defined storage  solutions and hyperconverged infrastructure. As ScaleIO software supports multiple hypervisors and operating systems like VMware ESXi, Hyper-V, RHEL, Windows etc. customers with a heterogeneous IT infrastructure gets the most benefit out of it. Apart from that it offers multiple deployment modes like hyperconverged, two layer and mixed mode. I am sure most of you are very much familiar with the term hyperconverged where compute and storage runs together on the same box. You can scale both compute and storage resources together by adding more and more nodes to your cluster. A two layer mode is nothing but a storage only configuration where you can scale the storage resources separately. It is essentially a virtual SAN infrastructure implemented using ScaleIO SDS. A mixed mode scenario will usually occur when transitioning from storage only configuration to hyperconverged.

Now I will just give an overview on how to deploy ScaleIO on VMware and RHEL platforms. ScaleIO has tight integration with VMware and they provide a powershell script and vCenter plugin to simplify the deployment. In case of RHEL platform, you can use Installation Manager (IM) which is a part of ScaleIO Gateway for quick and easy deployment of ScaleIO cluster. Customers have multiple options to consume ScaleIO. They can just buy the ScaleIO software alone and use commodity x86 hardware to build the cluster (not a great idea for production deployments as they have to figure out and use the validated/ qualified hardware and software components to ensure seamless operation and proper support) or they can buy ScaleIO Ready Nodes which are prevalidated, preconfigured and optimized PowerEdge servers to deploy ScaleIO cluster. Apart from that there is another offering VxRack System Flex which is a rack-scale hyperconverged solution built on Dell EMC PowerEdge servers with integrated Cisco networking and ScaleIO software. 

Lets have a look at the major components of ScaleIO. Below figure shows a 5 node hyperconverged ScaleIO cluster running on a highly available VMware platform. The three main components of ScaleIO are:

  • SDC - ScaleIO Data Client
  • SDS - ScaleIO Data Server
  • MDM - Meta Data Manager


In this scenario, all 5 nodes have ESXi installed and clustered. All nodes have local hard disks present in them. And its the responsibility of ScaleIO software to pool all the hard disks from all 5 nodes forming a distributed virtual SAN.

SDC is a light weight driver which is responsible for presenting LUNs provisioned from the ScaleIO system. SDS is responsible for managing local disks present in each node. MDM contains all the metadata required for system operation and configuration changes. It manages the metadata, SDC, SDS, system capacity, device mappings, volumes, data protection, errors/ failures, rebuild and rebalance operations etc. ScaleIO supports 3 node/ 5 node MDM cluster. Above figure shows a 5 node MDM cluster, where there will be 3 manager MDMs and out of which one will be master and two will be slaves and there will be two Tie-Breaker (TB) which helps in deciding master MDM by maintaining a majority in the cluster. In a production environment with 5 or more nodes, it is recommended to use a 5 node MDM cluster as it can tolerate 2 MDM failures.

ScaleIO uses a distributed two way mesh mirror scheme to protect data against disk or node failures. To ensure QoS it has the capability where you can limit bandwidth as well as IOPS for each volume provisioned from a ScaleIO cluster. And regarding scalability a single ScaleIO cluster supports upto 1024 nodes. In very large ScaleIO deployments it is highly recommended to configure separate protection domains and fault sets to minimize the impact of multiple failures at the same time. 

You can download ScaleIO software for free to test and play around in your lab environment.

References:
Dell EMC ScaleIO Basic Architecture
Dell EMC ScaleIO Design Considerations And Best Practices
Dell EMC ScaleIO Ready Node

Friday, April 28, 2017

Storage Spaces Direct - Volumes and Resiliency

Storage Spaces Direct (S2D) is the Microsoft implementation of software defined storage (SDS). This article briefly explains about the different types of volumes that can be created on a S2D cluster. Once you enable S2D using Enable-ClusterS2D cmdlet, it will automatically claim all physical disks in the cluster and forms a storage pool. On top of this pool you can create multiple volumes which is explained below.

Mirror
  • Recommended for workloads that have strict latency requirements or that need lots of mixed random IOPS
  • Eg: SQL Server databases or performance-sensitive Hyper-V VMs
  • If you have a 2 node cluster: Storage Spaces Direct will automatically use two-way mirroring for resiliency
  • If your cluster has 3 nodes: it will automatically use three-way mirroring
  • Three-way mirror can sustain two fault domain failures at same time
new-volume -friendlyname "Volume A" -filesystem CSVFS_ReFS -storagepoolfriendlyname S* -size 1TB
  • You can create two-way mirror by mentioning "PhysicalDiskRedundancy 1"
new-volume -friendlyname "Volume A" -filesystem CSVFS_ReFS -storagepoolfriendlyname S* -size 1TB -PhysicalDiskRedundancy 1

Parity
  • Recommended for workloads that write less frequently, such as data warehouses or "cold" storage, traditional file servers, VDI etc.
  • For creating dual parity volumes min 4 nodes are required and can sustain two fault domain failures at same time
new-volume -friendlyname "Volume B" -filesystem CSVFS_ReFS -storagepoolfriendlyname S* -size 1TB -resiliencysettingname Parity
  • You can create single parity volumes using the below
new-volume -friendlyname "Volume B" -filesystem CSVFS_ReFS -storagepoolfriendlyname S* -size 1TB -resiliencysettingname Parity -PhysicalDiskRedundancy 1

Mixed/ Tiered / Multi-Resilient (MRV)
  • In Windows Server 2012 R2 Storage Spaces, when you create storage tiers you dedicated physical media devices. That means SSD for performance tier and HDD for capacity tier
  • But in Windows Server 2016, tiers are differentiated not only by media types; it can include resiliency types too
  • MRV = Three-way mirror + dual-parity
  • In a MRV, three-way mirror portion is considered as performance tier and dual parity portion as capacity tier
  • Recommended for workloads that write in large, sequential, such as archival or backup targets
  • Writes land to mirror section of the volume and then it is gradually moved/ rotated in to parity portion later
  • Each MRV by default will have 32 MB Write-back cache 
  • ReFS starts rotating data into the parity portion at 60% utilization of the mirror portion and gradually as utilization increases the speed of data movement to parity portion also increases
  • You should have min 4 nodes to create a MRV
new-volume -friendlyname "Volume C" -filesystem CSVFS_ReFS -storagepoolfriendlyname S* -storagetierfriendlynames Performance, Capacity -storagetiersizes 1TB, 9TB

References: