Friday, February 21, 2020

VMware PowerCLI 101 - part7 - Working with vROps

This article explains how to work with vROps resources using PowerCLI. The following diagram shows the relationship between adapters, resource kinds, and resources. There can be multiple adapters installed on the vROps instance. Each adapter kind will have multiple resource kinds and each resource kind will have multiple resources. And each resource will have its own badges and badge scores.


Note I am using the following versions:
PowerShell: 5.1.14393.3383
VMware PowerCLI: 11.3.0.13990089
vROps: 7.0

Connect to vROps:
Connect-OMServer <IP of vROps>

Get the list of all installed adapters:
Get-OMResource | select AdapterKind -Unique


Get all resource kinds of a specific adapter:
Get-OMResource -AdapterKind VMWARE | select ResourceKind -Unique


Get the list of resources of a specific resource kind:
Get-OMResource -ResourceKind Datacenter


Another example:
Get-OMResource -ResourceKind ClusterComputeResource


Get details of a specific resource:
Get-OMResource -Name Cluster01 | select *


Get badge details of a selected resource:
(Get-OMResource -Name Cluster01).ExtensionData.Badges


List all resources of an adapter kind where health is not green:
Get-OMResource -AdapterKind VMWARE | select AdapterKind,ResourceKind,Name,Health,State,Status | where health -ne Green | ft


Get the list all objects of an adapter kind that have collection issues:
Get-OMResource -AdapterKind VMWARE | select AdapterKind,ResourceKind,Name,Health,State,Status | where {($_.Status -ne "DataReceiving") -or ($_.State -ne "Started")} | ft


Get the list of all active critical alerts from a specific adapter type:
Get-OMResource -AdapterKind VMWARE | Get-OMAlert -Criticality Critical -Status Active


Hope it was helpful. Cheers!

Related posts

VMware PowerCLI 101 Blog Series

Sunday, February 16, 2020

How to manually add multiple NICs to the vROps 8.x appliance

Important note: This is officially NOT supported by vROps. I've had a specific one off use case in my lab. It is just a quick workaround and is not recommended in production environment as this solution is not supported by VMware.
 
This article explains how to add multiple network interfaces to a vROps 8.0 and 8.1 appliance. Recently we had a scenario where the vROps appliance needs access to different networks that are isolated/ not routed with the primary network management interface of vROps. In my case, the vROps instance needed access to 3 different networks.

Initially while installing the vROps there will be only one interface (10-eth0.network) and its the default interface for vROps appliance. 


For configuring additional interfaces follow the steps below:

  • Add a network card and connect to the respective port group by editing VM settings
  • Login to vROps with root creds
  • cd /etc/systemd/network/
  • Create an entry for the new interface 10-eth1.network (as it will not be present!)
  • vi 10-eth1.network
  • Provide all necessary IP details and save

  • Restart network service systemctl restart systemd-networkd
  • Verify /opt/vmware/share/vami/vami_config_net

  • Similarly, follow the above steps if you require more interfaces 

Note: This solutions is NOT officially supported by vROps. It is not recommended in production environment.

Related post 

References

Saturday, February 15, 2020

Kubernetes 101 - Part2 - Basic operations

In this article, I will walk you through basic kubectl commands for working with K8s clusters.

kubectl cluster-info

kubectl version --short

kubectl get namespaces

kubectl get nodes -o wide

kubectl get pods -o wide --all-namespaces

kubectl get pods --show-labels
kubectl get nodes --show-labels

Deploy a pod

Following is a sample yaml file for deploying a CentOS pod:

apiVersion: v1
kind: Pod
metadata:
 name: centos-pod
 labels:
  zone: test
  version: v1
spec:
 containers:
 - name: centos-pod
   image: centos:latest
   command: ["sleep"]
   args: ["1d"]
 nodeSelector:
    kubernetes.io/hostname: w2


To deploy the pod:
kubectl create -f centos-pod.yml

kubectl describe pod centos-pod

SSH into the pod:
kubectl exec -it centos-pod sh

kubectl delete pod centos-pod

Hope it was useful. Cheers!

Kubernetes 101 - Part1 - Create K8s cluster with kubeadm


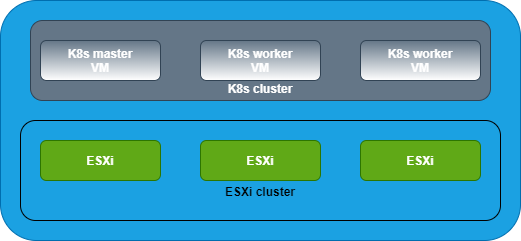
Deploy 3 CentOS 7 VMs. One will be the master and the other two will be workers/ slaves.
Master is "m1" and workers are "w1" and "w2".

Plan IP address
192.168.105.100 - m1
192.168.105.101 - w1
192.168.105.102 - w2
Step1: on all 3 nodes
vi /etc/hosts
192.168.105.100 m1
192.168.105.101 w1
192.168.105.102 w2
Step2: on all 3 nodes
#Disable firewall
sudo firewall-cmd --state
sudo systemctl stop firewalld
sudo systemctl disable firewalld
sudo systemctl status firewalld
setenforce 0
sed -i --follow-symlinks 's/SELINUX=enforcing/SELINUX=disabled/g' /etc/sysconfig/selinux
Step3: on all 3 nodes
#Configure iptables for Kubernetes
cat <<EOF > /etc/sysctl.d/k8s.conf
net.bridge.bridge-nf-call-ip6tables = 1
net.bridge.bridge-nf-call-iptables = 1
EOF
sysctl --system
Step4: on all 3 nodes
#Disable swap
swapoff -a
vi /etc/fstab (Edit fstab file and comment(#) swap partition)

reboot all 3 nodes
Step5: on all 3 nodes
#configure kubernetes repo
cat <<EOF > /etc/yum.repos.d/kubernetes.repo
[kubernetes]
name=Kubernetes
enabled=1
gpgcheck=1
repo_gpgcheck=1
EOF
Step6: Install docker on all 3 nodes
yum install docker -y
Step7: on all 3 nodes
yum install -y kubeadm kubectl kubelet --disableexcludes=kubernetes
systemctl daemon-reload
systemctl restart docker && systemctl enable --now docker
systemctl restart kubelet && systemctl enable --now kubelet
Step8: on master
kubeadm init --pod-network-cidr 10.244.0.0/16
Step9: on master
$ mkdir -p $HOME/.kube
$ sudo cp -i /etc/kubernetes/admin.conf $HOME/.kube/config
$ sudo chown $(id -u):$(id -g) $HOME/.kube/config
Step10: on master
Step11: on all worker nodes
Use the join token from master to join worker nodes to the K8s cluster.
Example:
kubeadm join 192.168.105.100:6443 --token 4j1cjv.gcj2hx9suq5akc7v \
--discovery-token-ca-cert-hash sha256:b2ead930d772d8af2e45ca8c86c3895b092484c10f8034e52f917e71dc4c3fea

Tuesday, January 7, 2020

vRealize Automation 8 - Part2 - Initial configuration using quickstart

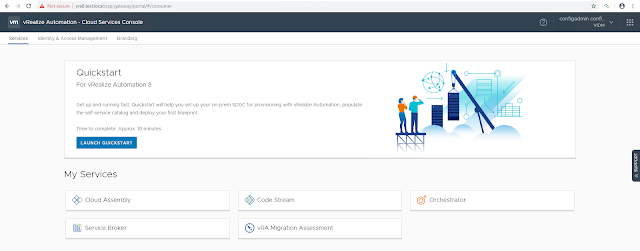
In this article, I will briefly explain how to set up your on-prem SDDC infrastructure for provisioning with vRA 8.0 using quickstart wizard. Follow my previous blog post vRA 8.0 - Part1 for the complete installation procedure. After a successful deployment, you can access the vRA Cloud Services Console.

Click Launch Quickstart.


Provide vCenter server details and click Validate.


Click Accept.


Select the datacenter to allow provisioning and click Create and go to next step.


Select the NSX version if you have it configured in your environment. In my case, I don't have NSX. So select None and click Create and go to next step.


Provide the basic configuration details like Datacenter, Template, Datastore, and Network. Quickstart will use this info to create your first blueprint and releases it to the catalog. This can be used for your first deployment. Here I've selected a centos7 template. 

Click Next step.


Select governance policies. I am using the defaults. Click Next step.


Review summary and click Run quickstart.

Note that here I did not select to "Automatically deploy my template when quickstart completed". In this case, a blueprint will be created and releases it to the catalog. You can request the catalog item to deploy it.


Once all the steps are completed, click Close.


At this point, a blueprint will be created under the quickstart project. And it can be seen under Cloud Assembly > Blueprints.

This blueprint is available as a catalog item. It can be seen under Service Broker > Catalog Items.

Hope it was useful. Cheers!

Related posts

Friday, December 27, 2019

vRealize Operations Manager 7.5 - Part10 - Adding Remote Collector Node

In this article, I will briefly explain the configuration of a remote collector node and a sample scenario too.

Note: Before adding the remote collector nodes a vROps master node should be present.

Refer to my previous blogs for the installation and configuration of the vROps master node and enabling high availability. Here I have a single node vROps 7.5 instance which is a master and I will be expanding it with a remote collector node.

Consider the following scenario:

Datacenter A is the head office where the vROps master is installed. Datacenter B and C need to be monitored using the vROps instance configured at Datacenter A. In this case, Remote Collector nodes are installed at Datacenter B and C. As per VMware recommendation the latency between sites should be 200ms or less. 


Refer vROps 7.5 reference architecture for recommendations from VMware on different deployment profiles and other best practices. 

Deploy a vROps instance at the remote location and open its management IP address in a web browser. 

Click on Expand an existing installation.

Click Next.


Provide a name for the collector node and select node type Remote Collector.
Enter IP of vROps master node and click Validate.


Click Next.


Provide cluster admin password and click Next.


Click Finish.


This may take around 6-8 minutes to complete.


Select Finish adding new nodes.


Click OK.


The remote collector is now part of the cluster.


Now log in to the master vROps instance.
Select Administration > Management > Collector Groups.
You can see only the master node is part of the Default collector group.
Click Create collector Group (+).


Provide a name and select the remote collector node.


Now you can see the remote collector node is part of the newly created collector group.


Now, we will add a vCenter Adapter instance that will monitor the vCenter server of the remote site using the newly added remote collector node.
Click Administration > Solutions > Configuration > VMware vSphere.
Click Configure (gear icon).


Click (+) to add a new vCenter adapter and provide the necessary details.


In the advanced settings, select the collector group.


Click Test connection, Accept and save settings. 


Click OK.


Verify the collection state and status.


Hope it was useful. Cheers.

Related posts