Showing posts with label Docker. Show all posts

Saturday, April 20, 2024

Hugging Face - Part5 - Deploy your LLM app on Kubernetes

In our previous blog post, we explored the process of containerizing the Large Language Model (LLM) from Hugging Face using FastAPI and Docker. The next step is deploying this containerized application on a Kubernetes cluster. Additionally, I'll share my observations and insights gathered during this exercise. 


You can access the deployment yaml spec and detailed instructions in my GitHub repo: 

https://github.com/vineethac/huggingface/tree/main/6-deploy-on-k8s

Requirements

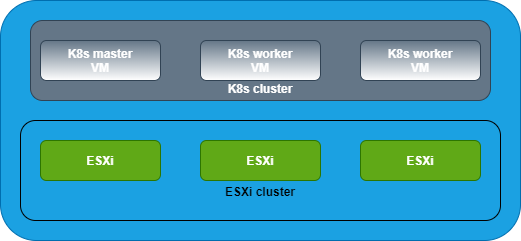
  • I am using a Tanzu Kubernetes Cluster (TKC).
  • Each node is of size best-effort-2xlarge which has 8 vCPU and 64Gi of memory.

❯ KUBECONFIG=gckubeconfig k get node
NAME                                             STATUS   ROLES                  AGE    VERSION
tkc01-control-plane-49jx4                        Ready    control-plane,master   97d    v1.23.8+vmware.3
tkc01-control-plane-m8wmt                        Ready    control-plane,master   105d   v1.23.8+vmware.3
tkc01-control-plane-z6gxx                        Ready    control-plane,master   97d    v1.23.8+vmware.3
tkc01-worker-nodepool-a1-pqq7j-dc6957d97-8gjn8   Ready    <none>                 21d    v1.23.8+vmware.3
tkc01-worker-nodepool-a1-pqq7j-dc6957d97-c9nfq   Ready    <none>                 21d    v1.23.8+vmware.3
tkc01-worker-nodepool-a1-pqq7j-dc6957d97-cngff   Ready    <none>                 21d    v1.23.8+vmware.3
❯

  • I've attached 256Gi storage volumes to the worker nodes that is mounted at /var/lib/containerd. The worker nodes on which these llm pods are running should have enough storage space. Otherwise you may notice these pods getting stuck/ restarting/ unknownstatus. If the worker nodes run out of the storage disk space, you will see pods getting evicted with warnings The node was low on resource: ephemeral-storage. TKC spec is available in the above mentioned Git repo.

Deployment

  • This works on a CPU powered Kubernetes cluster. Additional configurations might be required if you want to run this on a GPU powered cluster.
  • We have already instrumented the Readiness and Liveness functionality in the LLM app itself. 
  • The readiness probe invokes the /healthz endpoint exposed by the FastAPI app. This will make sure the FastAPI itself is healthy/ responding to the API calls.
  • The liveness probe invokes liveness.py script within the app. The script invokes the /ask endpoint which interacts with the LLM and returns the response. This will make sure the LLM is responding to the user queries. For some reason if the llm is not responding/ hangs, the liveness probe will fail and eventually it will restart the container.
  • You can apply the deployment yaml spec as follows:
❯ KUBECONFIG=gckubeconfig k apply -f fastapi-llm-app-deploy-cpu.yaml

Validation


❯ KUBECONFIG=gckubeconfig k get deploy fastapi-llm-app
NAME              READY   UP-TO-DATE   AVAILABLE   AGE
fastapi-llm-app   2/2     2            2           21d
❯
❯ KUBECONFIG=gckubeconfig k get pods | grep fastapi-llm-app
fastapi-llm-app-758c7c58f7-79gmq                               1/1     Running   1 (71m ago)    13d
fastapi-llm-app-758c7c58f7-gqdc6                               1/1     Running   1 (99m ago)    13d
❯
❯ KUBECONFIG=gckubeconfig k get svc fastapi-llm-app
NAME              TYPE           CLUSTER-IP      EXTERNAL-IP     PORT(S)          AGE
fastapi-llm-app   LoadBalancer   10.110.228.33   10.216.24.104   5000:30590/TCP   5h24m
❯

Now you can just do a curl against the EXTERNAL-IP of the above mentioned fastapi-llm-app service.

❯ curl http://10.216.24.104:5000/ask -X POST -H "Content-Type: application/json" -d '{"text":"list comprehension examples in python"}'

In our next blog post, we'll try enhancing our FastAPI application with robust instrumentation. Specifically, we'll explore the process of integrating FastAPI metrics into our application, allowing us to gain valuable insights into its performance and usage metrics. Furthermore, we'll take a look at incorporating traces using OpenTelemetry, a powerful tool for distributed tracing and observability in modern applications. By leveraging OpenTelemetry, we'll be able to gain comprehensive visibility into the behavior of our application across distributed systems, enabling us to identify performance bottlenecks and optimize resource utilization.

Stay tuned for an insightful exploration of FastAPI metrics instrumentation and OpenTelemetry integration in our upcoming blog post!

Hope it was useful. Cheers!

Saturday, March 30, 2024

Hugging Face - Part4 - Containerize your LLM app using Python, FastAPI, and Docker

In this exercise, our objective is to integrate an API endpoint for the Large Language Model (LLM) provided by Hugging Face using FastAPI. Additionally, we aim to encapsulate this whole application within a Docker container for portability and ease of deployment.

To achieve this, our project consists of several key components:

  • Large Language Model: Our application logic resides in model.py, where the model_pipeline function serves as the core engine behind our LLM interaction using LangChain. We've chosen the Mistral Instruct model from Hugging Face for this exercise.

  • API Endpoint Integration: We'll be incorporating an API endpoint using FastAPI to seamlessly interact with the LLM downloaded from Hugging Face. The main.py file implements the FastAPI framework, defining routes and endpoints. Specifically, the /ask endpoint invokes the model_pipeline function to interact with the Mistral Instruct model and generate a response.

  • Containerization: Utilizing the Dockerfile, we containerize our FastAPI LLM application. This ensures that our application, along with its dependencies, can be easily packaged and deployed across various environments.


You can access the Dockerfile, Python code, and other observations on my GitHub repository:

https://github.com/vineethac/huggingface/tree/main/5-containerize-llm-app

Deploy on Kubernetes as a pod

Deploying directly as a pod is not a preferred way. This is just for quick testing purpose! In the next blog post we will see how to deploy this as a Kubernetes deployment resource.

❯ KUBECONFIG=gckubeconfig k run hf-11 --image=vineethac/fastapi-llm-app:latest --image-pull-policy=Always
pod/hf-11 created
❯ KUBECONFIG=gckubeconfig kg po hf-11
NAME    READY   STATUS              RESTARTS   AGE
hf-11   0/1     ContainerCreating   0          2m23s
❯
❯ KUBECONFIG=gckubeconfig kg po hf-11
NAME    READY   STATUS    RESTARTS   AGE
hf-11   1/1     Running   0          26m
❯
❯ KUBECONFIG=gckubeconfig k logs hf-11 -f
Downloading shards: 100%|██████████| 3/3 [02:29<00:00, 49.67s/it]
Loading checkpoint shards: 100%|██████████| 3/3 [00:03<00:00,  1.05s/it]
INFO:     Will watch for changes in these directories: ['/fastapi-llm-app']
INFO:     Uvicorn running on http://0.0.0.0:5000 (Press CTRL+C to quit)
INFO:     Started reloader process [7] using WatchFiles
Loading checkpoint shards: 100%|██████████| 3/3 [00:11<00:00,  3.88s/it]
INFO:     Started server process [25]
INFO:     Waiting for application startup.
INFO:     Application startup complete.
2024-03-28 08:19:12 hf-11 watchfiles.main[7] INFO 3 changes detected
2024-03-28 08:19:48 hf-11 root[25] INFO User prompt: select head or tail randomly. strictly respond only in one word. no explanations needed.
2024-03-28 08:19:48 hf-11 root[25] INFO Model: mistralai/Mistral-7B-Instruct-v0.2
Setting `pad_token_id` to `eos_token_id`:2 for open-end generation.
2024-03-28 08:19:54 hf-11 root[25] INFO LLM response:  Head.
2024-03-28 08:19:54 hf-11 root[25] INFO FastAPI response:  Head.
INFO:     127.0.0.1:53904 - "POST /ask HTTP/1.1" 200 OK
INFO:     127.0.0.1:55264 - "GET / HTTP/1.1" 200 OK
INFO:     127.0.0.1:43342 - "GET /healthz HTTP/1.1" 200 OK

For a quick validation, I did exec into the pod and curl against the exposed APIs.

❯ KUBECONFIG=gckubeconfig k exec -it hf-11 -- bash
root@hf-11:/fastapi-llm-app#
root@hf-11:/fastapi-llm-app# curl -d '{"text":"select head or tail randomly. strictly respond only in one word. no explanations needed."}' -H "Content-Type: application/json" -X POST http://localhost:5000/ask
{"response":" Head."}root@hf-11:/fastapi-llm-app#
root@hf-11:/fastapi-llm-app# curl localhost:5000
"Welcome to FastAPI for your local LLM!"root@hf-11:/fastapi-llm-app#
root@hf-11:/fastapi-llm-app#
root@hf-11:/fastapi-llm-app# curl localhost:5000/healthz
{"Status":"OK"}root@hf-11:/fastapi-llm-app#
root@hf-11:/fastapi-llm-app#


You can also use kubectl expose command to create a service for this pod and then port forward to it and then curl to it. 

Hope it was useful. Cheers!

Friday, February 23, 2024

Hugging Face - Part3 - Inference with Code Llama using LangChain

In the field of understanding and working with human language (NLP), Hugging Face is a key platform that provides many pre-trained models for different tasks. With Transformers, LangChain, and Python developers can easily use Hugging Face's models on their own computers for quick processing. Using LangChain offers a streamlined and user-friendly approach to tapping into the capabilities of pre-trained language models. In this blog post we focus on how to inference with Code Llama - Instruct model from Hugging Face locally using LangChain. 


You can access the Python script in my GitHub repository:
https://github.com/vineethac/huggingface/tree/main/4-codellama_with_langchain


To initiate inference with Code Llama, developers can start by specifying the desired model using its identifier, such as MODEL_ID = "codellama/CodeLlama-7b-Instruct-hf". Transformers simplifies the process by providing a unified interface with the familiar Python programming language, allowing users to effortlessly initialize the model and tokenizer.

Once the model and tokenizer are set up, developers can leverage LangChain's HuggingFacePipeline class to create a text generation pipeline. This pipeline, defined with parameters like max_new_tokens and repetition_penalty, becomes a powerful tool for local inferencing. By combining this pipeline with LangChain's PromptTemplate, developers can easily construct prompts and invoke the entire chain to generate responses. This streamlined process facilitates local inferencing with Code Llama, empowering developers to leverage Hugging Face's models for a wide range of natural language processing tasks in their Python applications. 


Example

root@hf-3:/codellama# python3 codellama_langchain.py
tokenizer_config.json: 100%|█████████████████████████████████████████████████████████| 749/749 [00:00<00:00, 3.57MB/s]
tokenizer.model: 100%|█████████████████████████████████████████████████████████████| 500k/500k [00:00<00:00, 4.48MB/s]
tokenizer.json: 100%|████████████████████████████████████████████████████████████| 1.84M/1.84M [00:00<00:00, 6.13MB/s]
special_tokens_map.json: 100%|███████████████████████████████████████████████████████| 411/411 [00:00<00:00, 1.86MB/s]
config.json: 100%|███████████████████████████████████████████████████████████████████| 646/646 [00:00<00:00, 3.40MB/s]
model.safetensors.index.json: 100%|██████████████████████████████████████████████| 25.1k/25.1k [00:00<00:00, 68.2MB/s]
model-00001-of-00002.safetensors: 100%|██████████████████████████████████████████| 9.98G/9.98G [01:50<00:00, 90.0MB/s]
model-00002-of-00002.safetensors: 100%|██████████████████████████████████████████| 3.50G/3.50G [00:39<00:00, 89.5MB/s]
Downloading shards: 100%|███████████████████████████████████████████████████████████████| 2/2 [02:30<00:00, 75.16s/it]
Loading checkpoint shards: 100%|████████████████████████████████████████████████████████| 2/2 [00:05<00:00, 2.86s/it]
generation_config.json: 100%|█████████████████████████████████████████████████████████| 116/116 [00:00<00:00, 110kB/s]

Ask codellama: given two unsorted integer lists. merge the two lists, sort the merged list, and find median using python. consider the length of the merged list while finding the median value.
Setting `pad_token_id` to `eos_token_id`:2 for open-end generation.
Here is a possible solution to the problem:

def merge_and_find_median(list1, list2):
# Merge the two lists
merged_list = list1 + list2

# Sort the merged list
merged_list.sort()

# Find the median value
if len(merged_list) % 2 == 0:
# Even number of elements in the merged list
median = (merged_list[len(merged_list) // 2 - 1] + merged_list[len(merged_list) // 2]) / 2
else:
# Odd number of elements in the merged list
median = merged_list[len(merged_list) // 2]

return median

Explanation:

* First, we merge the two lists by concatenating them.
* Then, we sort the merged list using the `sort()` method.
* Next, we check whether the length of the merged list is even or odd. If it's even, we take the average of the middle two elements of the list. If it's odd, we simply take the middle element as the median.
* Finally, we return the median value.

Note that this solution assumes that both input lists are sorted in ascending order. If they are not sorted, you may need to add additional code to sort them before merging and finding the median.</s>

Ask codellama: /bye
root@hf-3:/codellama#


Hope it was useful. Cheers!

Tuesday, February 20, 2024

Hugging Face - Part2 - Code generation with Code Llama - Instruct

Code Llama, an impressive publicly available machine learning model, is a specialised version of Llama 2 that was created by further training Llama 2 on code-specific datasets. It is specifically designed to tackle coding challenges. It can generate both code and descriptive natural language about code, making it a versatile asset for developers. Some common use cases include writing new functions or even debugging existing code. It supports a wide range of popular programming languages, including Python, C++, Java, PHP, Typescript (Javascript), C#, and Bash.

Code Llama – Instruct, an advanced variation of Code Llama which is designed to accept natural language instructions as input and returns the expected output. This unique feature makes the model more adept at understanding and fulfilling user requirements. The Meta AI team recommend using Code Llama - Instruct variants whenever you intend to use Code Llama for your code generation tasks.


In this blog post, I will guide you through the process of employing the Code Llama - Instruct model from Hugging Face locally for code generation tasks. We will be utilizing the Python Transformers library for this. You can access the Python script in my GitHub repository:

https://github.com/vineethac/huggingface/tree/main/3-codellama-instruct

Example

root@hf-5:/# python3 codellama_prompt.py
tokenizer_config.json: 100%|████████████████████████████████████████████████████████████████████████████████████████████████████████████████████████████████████████████████████████| 749/749 [00:00<00:00, 3.44MB/s]
tokenizer.model: 100%|████████████████████████████████████████████████████████████████████████████████████████████████████████████████████████████████████████████████████████████| 500k/500k [00:00<00:00, 4.12MB/s]
tokenizer.json: 100%|███████████████████████████████████████████████████████████████████████████████████████████████████████████████████████████████████████████████████████████| 1.84M/1.84M [00:00<00:00, 9.76MB/s]
special_tokens_map.json: 100%|██████████████████████████████████████████████████████████████████████████████████████████████████████████████████████████████████████████████████████| 411/411 [00:00<00:00, 2.08MB/s]
config.json: 100%|██████████████████████████████████████████████████████████████████████████████████████████████████████████████████████████████████████████████████████████████████| 646/646 [00:00<00:00, 3.51MB/s]
model.safetensors.index.json: 100%|█████████████████████████████████████████████████████████████████████████████████████████████████████████████████████████████████████████████| 25.1k/25.1k [00:00<00:00, 47.9MB/s]
model-00001-of-00002.safetensors: 100%|█████████████████████████████████████████████████████████████████████████████████████████████████████████████████████████████████████████| 9.98G/9.98G [02:02<00:00, 81.2MB/s]
model-00002-of-00002.safetensors: 100%|█████████████████████████████████████████████████████████████████████████████████████████████████████████████████████████████████████████| 3.50G/3.50G [00:45<00:00, 76.7MB/s]
Downloading shards: 100%|██████████████████████████████████████████████████████████████████████████████████████████████████████████████████████████████████████████████████████████████| 2/2 [02:48<00:00, 84.38s/it]
Loading checkpoint shards: 100%|███████████████████████████████████████████████████████████████████████████████████████████████████████████████████████████████████████████████████████| 2/2 [00:20<00:00, 10.10s/it]
generation_config.json: 100%|████████████████████████████████████████████████████████████████████████████████████████████████████████████████████████████████████████████████████████| 116/116 [00:00<00:00, 444kB/s]


Ask codellama/CodeLlama-7b-Instruct-hf: reverse a list in python.
Setting `pad_token_id` to `eos_token_id`:2 for open-end generation.
Result: <s>[INST] reverse a list in python. [/INST]  There are several ways to reverse a list in Python. Here are a few methods:

1. Using the `reversed()` function:

my_list = [1, 2, 3, 4, 5]
reversed_list = list(reversed(my_list))
print(reversed_list)  # [5, 4, 3, 2, 1]

2. Using slicing:

my_list = [1, 2, 3, 4, 5]
reversed_list = my_list[::-1]
print(reversed_list)  # [5, 4, 3, 2, 1]

3. Using the `reverse()` method:

my_list = [1, 2, 3, 4, 5]
my_list.reverse()
print(my_list)  # [5, 4, 3, 2, 1]

Note that the `reverse()` method reverses the list in place, meaning that it modifies the original list. The other two methods create a new list with the elements in reverse order.

Ask codellama/CodeLlama-7b-Instruct-hf: /bye
root@hf-5:/#

The first time you execute the Python script, the model will be automatically downloaded to your local machine. Subsequently, upon subsequent runs, the previously saved model will be utilized in processing user inputs.

root@hf-5:~# cd ~/.cache/huggingface/hub/
root@hf-5:~/.cache/huggingface/hub#
root@hf-5:~/.cache/huggingface/hub# ls | grep Instruct
models--codellama--CodeLlama-7b-Instruct-hf
root@hf-5:~/.cache/huggingface/hub#
root@hf-5:~/.cache/huggingface/hub# cd models--codellama--CodeLlama-7b-Instruct-hf
root@hf-5:~/.cache/huggingface/hub/models--codellama--CodeLlama-7b-Instruct-hf# ls
blobs  refs  snapshots
root@hf-5:~/.cache/huggingface/hub/models--codellama--CodeLlama-7b-Instruct-hf# cd blobs/
root@hf-5:~/.cache/huggingface/hub/models--codellama--CodeLlama-7b-Instruct-hf/blobs#
root@hf-5:~/.cache/huggingface/hub/models--codellama--CodeLlama-7b-Instruct-hf/blobs# ls -altrh
total 13G
-rw-r--r-- 1 root root  749 Feb 19 12:03 526f464cf83353c59f7c07b9e587498b47d67a1b
-rw-r--r-- 1 root root 489K Feb 19 12:03 45ccb9c8b6b561889acea59191d66986d314e7cbd6a78abc6e49b139ca91c1e6
-rw-r--r-- 1 root root 1.8M Feb 19 12:03 6b25321d89e21832a89e6273834eab0e4378a53b
-rw-r--r-- 1 root root  411 Feb 19 12:03 d85ba6cb6820b01226ef8bd40b46bb489041c6a8
-rw-r--r-- 1 root root  646 Feb 19 12:03 8fb4018bc8ceaddbaf7d3d238911a30fd5e9081a
-rw-r--r-- 1 root root  25K Feb 19 12:03 cd3b8fb46c4d5616e91520a7a7d9a5a75af759a8
-rw-r--r-- 1 root root 9.3G Feb 19 12:05 0f52c0eab2dafa0a13e8103a426b17137f7b053e9211334158d7bd7cc1148ceb
-rw-r--r-- 1 root root 3.3G Feb 19 12:06 9ddab1824225fbe405cea67c5d8d87666f1ab5c59ec89abdf2cacae9b555da75
-rw-r--r-- 1 root root  116 Feb 19 12:06 aa9aac2cbaa80cf25094e7d9a527bd1cab9f5321
drwxr-xr-x 6 root root 4.0K Feb 19 12:06 ..
drwxr-xr-x 2 root root 4.0K Feb 19 12:06 .
root@hf-5:~/.cache/huggingface/hub/models--codellama--CodeLlama-7b-Instruct-hf/blobs#

I hope it was useful. Cheers!

Monday, February 19, 2024

Hugging Face - Part1 - Getting started

This blog series will help you get started with Hugging Face, including:

  • Downloading and using Hugging Face models locally via the Python Transformers library.
  • Constructing an API for your LLM application using FastAPI.
  • Containerizing your project with Docker.
  • Deploying and running your containerized LLM application on a Kubernetes cluster.


An overview about Hugging Face, types of Language Models, and the Transformers library are given in my GitHub repo: https://github.com/vineethac/huggingface/tree/main

Here are some examples of running the language models locally from Hugging Face using Pipeline function from the Transformers library:

question-answering

Model used: distilbert-base-cased-distilled-squad

6-question-answering.py

'''
Question answering from a given context.
'''

from transformers import pipeline

question_answerer = pipeline(task="question-answering", model="distilbert-base-cased-distilled-squad")
output = question_answerer(
    question="What work I do?",
    context="My name is Vineeth and I work as a Site Reliability Engineer at VMware in Bangalore, India",
)

print(output)


root@hf-2:/transformers-course# python3 6-question-answering.py
{'score': 0.9214025139808655, 'start': 35, 'end': 60, 'answer': 'Site Reliability Engineer'}
root@hf-2:/transformers-course#


translation

Model used: Helsinki-NLP/opus-mt-fr-en

8-translation.py

'''
Translate from fr to en.
'''

from transformers import pipeline

translator = pipeline("translation", model="Helsinki-NLP/opus-mt-fr-en")
output = translator("Ce cours est produit par Hugging Face.")

print(output)


root@hf-2:/transformers-course# python3 8-translation.py
[{'translation_text': 'This course is produced by Hugging Face.'}]
root@hf-2:/transformers-course#


More details and examples are given in my GitHub repo:


https://github.com/vineethac/huggingface/tree/main/1-examples


Hope it was useful. Cheers!


Monday, January 15, 2024

Ollama - Part1 - Deploy Ollama on Kubernetes

Docker published GenAI stack around Oct 2023 which consists of large language models (LLMs) from Ollama, vector and graph databases from Neo4j, and the LangChain framework. These utilities can help developers with the resources they need to kick-start creating new applications using generative AI. Ollama can be used to deploy and run LLMs locally. In this exercise we will deploy Ollama to a Kubernetes cluster and prompt it.

In my case I am using a Tanzu Kubernetes Cluster (TKC) running on vSphere with Tanzu 7u3 platform powered by Dell PowerEdge R640 servers. The TKC nodes are using best-effort-2xlarge vmclass with 8 CPU and 64Gi Memory.  Note that I am running it on a regular Kubernetes cluster without GPU. If you have GPU, additional configuration steps might be required.


Hope it was useful. Cheers!

Sunday, December 3, 2023

Kubernetes mini project

In this mini project, we are going to learn the following:

  • Deploy a simple Python based web application on a Kubernetes cluster.
  • We will use Helm to deploy this app.
  • This web app uses FastAPI and exposes some metrics using the Prometheus Python client.
  • To store and visualize these metrics we will deploy Prometheus and Grafana in the K8s cluster.
  • We will also deploy and use an ingress controller for exposing the web app, Prometheus, and Grafana to external users.
  • For logging we will deploy and use Grafana Loki stack.


Full project in my GitHub

High-level steps to complete this project

Step1: Write the Python app.

Step2: Create the Dockerfile for the app.

Step3: Create the container image.

Step4: Push the container image to an image registry like Docker Hub.

Step5: Get access to a K8s cluster.

Step6: Deploy an ingress controller.

Step7: Create the Helm chart for your app and deploy it to the K8s cluster.

Step8: Deploy Prometheus stack on the K8s cluster using Helm.

Step9: Create a servicemonitor resource which defines the target to be monitored by Prometheus.

Step10: Verify targets and service discovery in Prometheus.

Step11: Configure Grafana dashboard and verify.

Step12. Deploy Grafana Loki stack using Helm.


Hope it was useful. Cheers!

Sunday, October 29, 2023

Kubernetes 101 - Part12 - Debug pod

While troubleshooting application connectivity and name resolution issues in Kubernetes we often have to access utilities like ping, nslookup, dig, traceroute, etc. Here is a container image that you can use in those cases. Following are some of the utilities that are pre-installed on this container image:

  • ping
  • dig
  • nslookup
  • traceroute
  • curl
  • wget
  • nc
  • netstat
  • ifconfig
  • route
  • host
  • arp
  • iostat
  • top
  • free
  • vmstat
  • pmap
  • mpstat
  • python3
  • pip


Run as a pod on Kubernetes

kubectl run debug --image=vineethac/debug -n default -- sleep infinity


Exec into the debug pod

kubectl exec -it debug -n default -- bash 
root@debug:/# ping 8.8.8.8 PING 8.8.8.8 (8.8.8.8) 56(84) bytes of data. 64 bytes from 8.8.8.8: icmp_seq=1 ttl=46 time=49.3 ms 64 bytes from 8.8.8.8: icmp_seq=2 ttl=45 time=57.4 ms 64 bytes from 8.8.8.8: icmp_seq=3 ttl=46 time=49.4 ms ^C --- 8.8.8.8 ping statistics --- 3 packets transmitted, 3 received, 0% packet loss, time 2003ms rtt min/avg/max/mdev = 49.334/52.030/57.404/3.799 ms root@debug:/#
root@debug:/# nslookup google.com Server: 10.96.0.10 Address: 10.96.0.10#53 Non-authoritative answer: Name: google.com Address: 142.250.72.206 Name: google.com Address: 2607:f8b0:4005:80c::200e root@debug:/# exit exit ❯


Reference

https://github.com/vineethac/Docker/tree/main/debug-image


Hope it was useful. Cheers!

Saturday, January 23, 2021

Benchmarking Kubernetes infrastructure using K-Bench

K-Bench is a framework to benchmark the control and data plane aspects of a Kubernetes cluster. More details are available at https://github.com/vmware-tanzu/k-bench. In my case, I am going to conduct this benchmarking study on a Tanzu Kubernetes cluster which is provisioned using Tanzu Kubernetes Grid service on a vSphere 7 U1 cluster.

Step 1: Clone the K-Bench repo

git clone https://github.com/vmware-tanzu/k-bench.git


Step 2: Install

./install.sh


Once the installation is done it will say, "Completed k-bench installation.".

Step 3: Run the benchmark

./run.sh


If you don't specify any test, then it is going to conduct the default set of tests. All sets of tests are defined under the config directory. If you browse to the config directory and list, there are separate folders specific to each test. You can see folders starting with cp and dp, and it refers to control plane and data plane related tests.


If no specific test is mentioned, then it is going to run all that is defined in the default directory. You can also see details of the test and results in the logs. The directories starting with "results" will have log files corresponding to each test run.


Following is a sample log that shows a summary of pod creation throughput, pod creation average latency, pod startup total latency, list/ update/ delete pod latency, etc.


Now, if you want to run a specific test case, you can do it as follows:
Usage: ./run.sh -r <run-tag> [-t <comma-separated-tests> -o <output-dir>]
DP network internode test

For example, you can run a data plane test to check the network performance between two nodes as shown below.

./run.sh -r "kbench-run-on-tkg-cluster-02"  -t "dp_network_internode" -o "./"


As soon as you run the above command, two pods will be created inside "kbench-pod-namespace" on two worker nodes as you see below.


It will then start "iperf3" process inside those two pods to create a network load following a client-server model as per the actions defined in the config.json file.


Sample logs are given below. It shows details like the amount of data transferred, transfer rate, network latency, etc.


Once the test run is complete, the pods and other resources created will be automatically deleted. Similarly, you can select the other set of tests that are pre-defined in the framework. I believe you have the flexibility to define custom test cases too as per your requirements. I hope it was useful. Cheers!

Related posts


Storage performance benchmarking of Tanzu Kubernetes clusters
Monitoring Tanzu Kubernetes cluster using Prometheus and Grafana


References


Sunday, September 27, 2020

Monitoring Tanzu Kubernetes cluster using Prometheus and Grafana

Updated: June 26, 2021

In this post, we will see how to deploy Prometheus and Grafana using Helm and Prometheus Operator to monitor Tanzu Kubernetes clusters. 


Following is my Tanzu K8s cluster setup:


Install Helm 3

curl https://raw.githubusercontent.com/kubernetes/helm/master/scripts/get-helm-3 > get_helm.sh
chmod 700 get_helm.sh
./get_helm.sh

Install Prometheus Operator using Helm

helm repo add prometheus-community https://prometheus-community.github.io/helm-charts
helm repo update
helm install pro-mon -n pro-mon prometheus-community/kube-prometheus-stack


Verify all


Port forward Grafana to 3000 to access the dashboards


Login to Grafana using a web browser at localhost:3000/login .

The default username is "admin" and the password is "prom-operator".


Go to Dashboards - Manage to view/ access the list of out-of-the-box K8s dashboards. The following are some of the sample dashboards.


Kubernetes | Compute Resources | Namespace (Pods)


Kubernetes | Networking | Namespace (Pods)


Kubernetes | API server


This is not limited to just Tanzu K8s clusters. You can also monitor OpenShift and Upstream K8s clusters following this method. Hope it was useful. Cheers!

References


https://github.com/prometheus-community/helm-charts/tree/main/charts/kube-prometheus-stack
[www.bogotobogo.com] Docker_Kubernetes_Prometheus_Deploy_using_Helm_and_Prometheus_Operator

Saturday, August 15, 2020

Visualize your Kubernetes clusters and workloads using Octant

In this article, I will explain how to visualize your Kubernetes clusters and workload using Octant.   


Download Octant


You can download the latest release of Octant from https://github.com/vmware-tanzu/octant/releases.

Thursday, July 9, 2020

Tanzu Kubernetes Grid (TKG) on vSphere 6.7 U3 - Part3

In this blog, I will explain how to deploy an FIO application pod with persistent storage on your Tanzu Kubernetes workload cluster.

Step 1: Deploy a K8s workload cluster

tkg create cluster <cluster name> --plan=dev


Now the workload K8s cluster is deployed with a Master, LB, and Worker node.


Wednesday, June 24, 2020

Tanzu Kubernetes Grid (TKG) on vSphere 6.7 U3 - Part2

In this post, I will explain how to deploy and manage multiple Kubernetes workload clusters using TKG CLI.

To view the management cluster: tkg get management-cluster
To create a new workload cluster: tkg create cluster <cluster name> --plan=<cluster plan>


Now as per default dev plan one master, one worker, and a load balancer are deployed.


Tuesday, June 23, 2020

Tanzu Kubernetes Grid (TKG) on vSphere 6.7 U3 - Part1


TKG is an enterprise-ready Kubernetes runtime which provides a consistent, upstream-compatible implementation of Kubernetes, that is tested, signed, and supported by VMware. 

Installation

I am using a 3 node vSAN cluster running vSphere 6.7 U3 to deploy TKG. The first step is to prepare a VM that will be used to kickstart the deployment process. Here I am using a CentOS 7 VM with desktop UI. Download the TKG CLI, TKG Kubernetes OVA, and Load Balancer OVA from the following link:


I am using the following versions:
  • VMware Tanzu Kubernetes Grid CLI 1.1 Linux
  • VMware Tanzu Kubernetes Grid 1.1.0 Kubernetes v1.18.2 OVA
  • VMware Tanzu Kubernetes Grid 1.1 Load Balancer OVA

Unzip and install TKG CLI on the CentOS VM.

Saturday, February 15, 2020

Kubernetes 101 - Part1 - Create K8s cluster with kubeadm


Deploy 3 CentOS 7 VMs. One will be the master and the other two will be workers/ slaves.
Master is "m1" and workers are "w1" and "w2".

Plan IP address
192.168.105.100 - m1
192.168.105.101 - w1
192.168.105.102 - w2
Step1: on all 3 nodes
vi /etc/hosts
192.168.105.100 m1
192.168.105.101 w1
192.168.105.102 w2
Step2: on all 3 nodes
#Disable firewall
sudo firewall-cmd --state
sudo systemctl stop firewalld
sudo systemctl disable firewalld
sudo systemctl status firewalld
setenforce 0
sed -i --follow-symlinks 's/SELINUX=enforcing/SELINUX=disabled/g' /etc/sysconfig/selinux
Step3: on all 3 nodes
#Configure iptables for Kubernetes
cat <<EOF > /etc/sysctl.d/k8s.conf
net.bridge.bridge-nf-call-ip6tables = 1
net.bridge.bridge-nf-call-iptables = 1
EOF
sysctl --system
Step4: on all 3 nodes
#Disable swap
swapoff -a
vi /etc/fstab (Edit fstab file and comment(#) swap partition)

reboot all 3 nodes
Step5: on all 3 nodes
#configure kubernetes repo
cat <<EOF > /etc/yum.repos.d/kubernetes.repo
[kubernetes]
name=Kubernetes
enabled=1
gpgcheck=1
repo_gpgcheck=1
EOF
Step6: Install docker on all 3 nodes
yum install docker -y
Step7: on all 3 nodes
yum install -y kubeadm kubectl kubelet --disableexcludes=kubernetes
systemctl daemon-reload
systemctl restart docker && systemctl enable --now docker
systemctl restart kubelet && systemctl enable --now kubelet
Step8: on master
kubeadm init --pod-network-cidr 10.244.0.0/16
Step9: on master
$ mkdir -p $HOME/.kube
$ sudo cp -i /etc/kubernetes/admin.conf $HOME/.kube/config
$ sudo chown $(id -u):$(id -g) $HOME/.kube/config
Step10: on master
Step11: on all worker nodes
Use the join token from master to join worker nodes to the K8s cluster.
Example:
kubeadm join 192.168.105.100:6443 --token 4j1cjv.gcj2hx9suq5akc7v \
--discovery-token-ca-cert-hash sha256:b2ead930d772d8af2e45ca8c86c3895b092484c10f8034e52f917e71dc4c3fea